




You don’t need a fancy caterer to save a milestone dinner. You just need a recipe that holds up.
Golden anniversaries are heavy stuff. Fifty years. The pressure to make it “perfect” is suffocating. But here is the truth: nobody remembers the stiff formalities. They remember the food. Specifically, the thing that tasted like home and comfort all at once.
If you are searching for best golden anniversary dessert recipes, stop scrolling past the complicated French pastries. They are temperamental. They melt. They judge you.
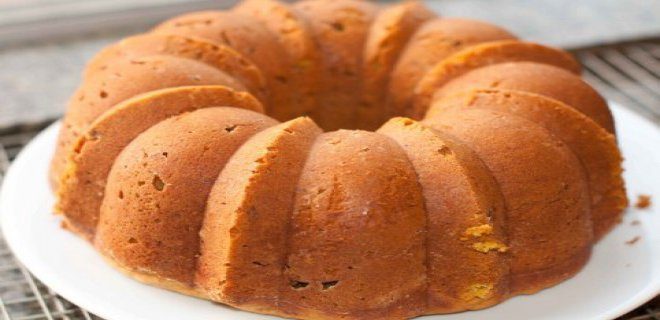
What you want is a pumpkin walnut cake.
It is moist. It is dense. It keeps for days. It feeds a crowd without looking like you tried too hard. It is the quiet hero of the table.
Зміст
How To Bake A Moist Pumpkin Walnut Cake From Scratch
This isn’t just a cake. It is a strategy.
The original source calls it a “top pick” for golden days, and for good reason. It uses pumpkin puree, not liquid pumpkin. This is the key to moisture without making the cake soggy. The walnuts add crunch. The vanilla keeps it light.
Here is what you need to gather before you even think about preheating the oven.
- 2 cups pumpkin puree
- 2 eggs
- 1 cup sugar
- 1 cup milk
- 1/2 cup vegetable oil
- 2 cups all-purpose flour
- 1 tsp baking powder
- 1 tsp vanilla powder (or extract)
- 1 cup chopped walnuts
The method is straightforward. No folding techniques required. Just mix and pour.
- Whisk the eggs and sugar first. This builds the structure.
- Add the milk and oil. Keep whisking.
- Dump in the flour, baking powder, and vanilla. Mix until smooth.
- Fold in the pumpkin puree. This is the bulk of it. Mix well.
- Stir in the walnuts by hand. Don’t overmix the batter, or the cake gets tough.
- Grease your cake pan. Pour the batter in.
- Bake at 180°C (350°F) for 30 minutes.
That’s it.
You walk away for half an hour. You chat with guests. You check on the kids. The cake handles itself.
A good cake doesn’t demand attention. It just delivers.
Why does this work for an anniversary?
Because it is autumnal. It feels warm. It pairs with coffee or tea or just a glass of red wine. It is inclusive. Vegetarians can eat it. Nuts add protein. It feels substantial.
You can make it the night before. It actually tastes better after resting. The flavors meld. The texture firms up slightly. This means you are not standing over a hot stove on the day of the party. You are actually celebrating.
Most people overcomplicate milestone celebrations. They buy expensive decorations. They hire photographers who stand in the way. They cook dishes that require three stages of cooling.
Don’t be that host.
Be the one who hands out a warm slice of pumpkin walnut cake with a smile. It is practical. It is honest. It is delicious.
Does it
Spinach Quiche Recipe: The Ultimate Spinach Quiche Recipe for Busy Days
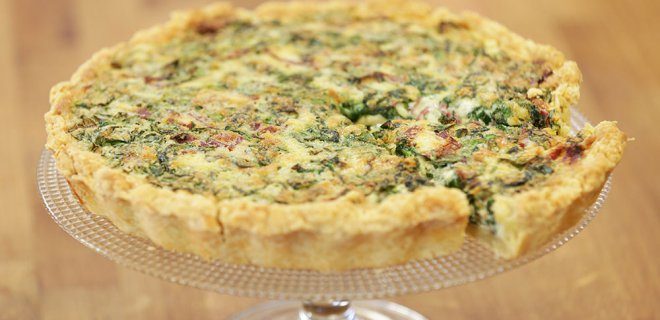
Let’s talk about the spinach quiche recipe. It’s not just another casserole. It’s comfort food that actually looks good enough to serve when someone unexpected knocks. And that’s the point.
You need the right gear. Not just ingredients. The texture matters. If your crust is soggy, the rest doesn’t matter. So let’s get this right.
How to Make the Perfect Crust for Your Spinach Quiche Recipe
The dough is the foundation. Mess this up and you have a wet salad situation. Don’t do that.
Here is what you need for the base:
- 400 gr flour
- 200 gr butter (cold is better, trust me)
- 2 eggs (from your total of 5)
- Salt
Rub the butter into the flour. Use your fingertips. It should look like breadcrumbs. Not sand. Breadcrumbs. Add the two eggs and the salt. Knead it until it holds together. Don’t overwork it. You want tender, not tough.
Roll it out to fit your tart pan. Press it in. Prick it all over with a fork. This is non-negotiable. The steam needs to escape. Otherwise, it bubbles up. Nobody likes a bubbly crust.
Bake it at 180 degrees Celsius for 30 minutes. Preheated oven. Not “it feels warm.” Preheated. This blind bakes the crust. It creates a barrier. Moisture stays in the filling. The crust stays crisp.
Preparing the Filling for This Spinach Quiche Recipe
While the crust bakes, chop.
- 200 gr spinach
- 12 slices of processed ham (pastırma)
Cut them small. Fine dice. You want even distribution in every bite. No massive chunks of spinach hiding in the corner.
Now the liquid part. This binds it all together.
- 2 cups cream
- 1 cup grated cheddar cheese
- 3 eggs (the ones you saved)
- Black pepper
- Nutmeg
- Salt
Whisk the cream, cheese, pepper, nutmeg, and salt in a bowl. Stir in the spinach and ham. It looks messy. That’s fine. It’s supposed to be rustic.
Baking and Serving Your Spinach Quiche Recipe
Pour that mixture over the pre-baked crust. Smooth it out gently. Don’t pack it down. Let it settle.
Back in the oven. Same temperature. 180 degrees. Another 20 minutes.
How do you know it’s done? The center should be set. Not jiggly like jelly. Firm to the touch. A knife inserted should come out clean.
Let it cool. Just for a minute. It continues to set as it cools. If you cut it too hot, it falls apart. Patience pays off here.
“The difference between good and great is the crust.”
This spinach quiche recipe works because it balances fat and protein. The cream and cheese bring richness. The spinach adds color and earthiness. The ham adds salt and structure. It’s a complete meal. Breakfast, lunch, or dinner. Doesn
olive oil pea salad recipe: the shortcut to a vibrant side
You don’t need a fancy kitchen to pull this off. Just a pot. A knife. Some patience.
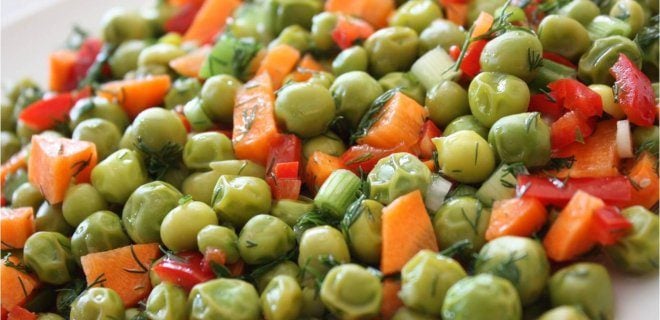
The star here is 500 grams of peas. That’s the bulk. The rest? Supporting actors.
- 2 carrots
- 3 green onions
- Half a bunch of parsley (or dill, if that’s your jam)
- 1 red bell pepper
- Olive oil
- Salt
Simple. Honest.
how to prep olive oil pea salad without overcooking
Here’s the thing about peas. They turn mushy fast. You want them tender. Not soup.
Drop the peas in a pot. Cover with water. Boil. Watch them. They’re done when they’re bright green and just soft enough to bite through without a crunch. Drain.
While they go, chop the carrots. Cubes. Small ones. Throw them in the same water as the peas if you’re lazy. Or boil them separately if you want control. Your call.
Chop the green onions. Fine. Really fine. You don’t want big chunks of raw onion overpowering the delicate pea flavor.
Dice the red bell pepper. Add color. Add crunch. It’s not just decoration. It’s texture.
“Mix everything in a salad bowl.”
Pour the olive oil. Good oil. The kind you’d drizzle on bread. Not the stuff you fry with. Taste it. If it tastes like paint thinner, buy better oil.
Salt it.
Stir.
Eat it.
Why does this work? Because it’s cold. Or room temp. It’s fresh. It cuts through heavy meals. It’s light but substantial.
You can make it ahead. In fact, you should. Let it sit in the fridge for an hour. The flavors marry. The parsley wakes up.
Who is this for? Anyone tired of mayonnaise-heavy salads. Anyone who wants to eat vegetables that don’t taste like punishment.
It’s not just a side. It’s a statement.
You don’t need to be a chef. You need to be willing to chop things.
Why this savory cheese and dill cake is your new weekend staple
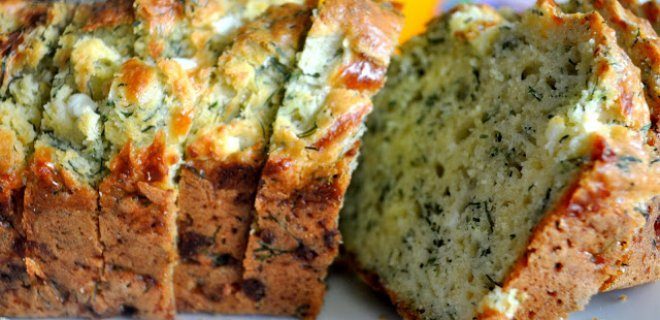
Salt is doing heavy lifting lately. We are tired of the endless sugar rush. Enter the peynirli dereotlu kek (cheese and dill cake). It sounds like an experiment. It tastes like a hug. The dill smell alone hits different. It cuts through the richness of the white cheese. You get that sharp tang mixed with fresh herbs. It’s weirdly perfect.
Here is what you actually need to pull this off. Keep it simple.
- 200 grams of white cheese (süzme peynir works best)
- 1 cup of yogurt
- 3 cups of flour
- 1 cup of liquid oil
- 3 eggs
- 1 bunch of fresh dill
- 1 packet of baking powder
- 1 teaspoon of salt
- 1 teaspoon of black pepper
How to mix the batter without overthinking it
Start with the wet stuff. Whip the eggs, oil, and yogurt together until they look happy. Don’t rush it. The texture matters.
Dump in the flour and baking powder. Stir. Now add the cheese. Salt. Pepper. Whip again. The batter will get thick. That’s fine.
Chop the dill. Fine. Really fine. You want those green flecks everywhere. Fold them in.
Grease your cake pan. Pour the mess in. Smooth the top if you care about aesthetics. I don’t.
Pop it into an oven preheated to 180°C. Let it bake for 50 minutes.
Wait. The hardest part.
When it comes out, let it cool. It firms up as it rests. The flavor deepens. Is it better with tea? Obviously.
Serve it warm or cold. It doesn’t judge. It just sits there, smelling like herb garden and comfort. Slice it thick. Don’t be shy.
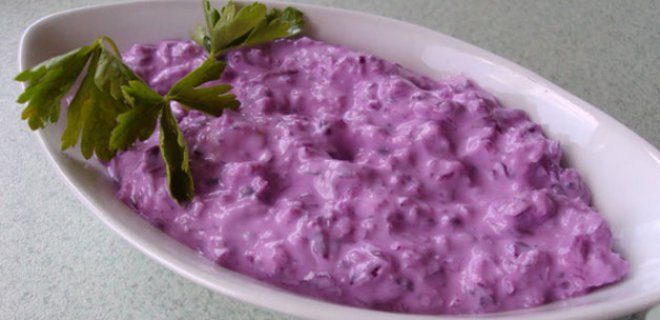
why this purple cabbage salad is the ultimate comfort food
There is a specific kind of peace that comes with golden days. No rush. No alarms. Just you and a bowl of something cold, creamy, and deeply satisfying. This isn’t just a side dish. It’s the reason you pause during tea time.
The secret? It’s not just cabbage. It’s the dressing.
Most people skip red cabbage because it feels too crunchy or too acidic. That’s a mistake. You fix it by drowning it in yogurt. Adding a little mayonnaze cuts the sharpness. The garlic? That’s the soul of the thing.
How to make the best yogurt-based purple cabbage salad
You don’t need fancy equipment. A knife. A bowl. Some patience.
Start with the cabbage. One whole head. Shred it. Thinly. If the strips are thick, you’ll be fighting the fork. Thin shreds wilt slightly into the dressing, becoming tender but still keeping that snap.
Now, the sauce. This is where the magic happens.
- 2 cups of yogurt. Thick, preferably.
- 2 tablespoons of mayonnaise. Yes, really. It adds body.
- 2 cloves of garlic. Grated. Not chopped. Grated means it disappears into the liquid. It becomes a flavor, not a texture.
- Lemon juice. Enough to wake up the palate.
- Salt. Taste as you go.
Mix the yogurt and mayo first. Then the garlic. Then the lemon and salt. Stir it until it looks like a thick, pale gray cloud.
Dump the shredded cabbage in. Toss it. Really toss it. You want every single strip coated. Let it sit for a minute. Watch it soften.
Serve it on a plate. Sprinkle fresh parsley on top. Not chopped parsley. Whole leaves. For color. For life.
The combination of yogurt and mayonnaise creates a texture that clings to the cabbage without making it soggy.
Why does this work? Because acid (lemon) meets fat (yogurt/mayo) meets crunch (cabbage). It’s balanced. It’s honest. It doesn’t try to be anything other than what it is.
Next time you have tea and nothing else to do, make this. You’ll thank yourself.
What “Afiyet Olsun” Actually Means in Context
It’s not just “bon appétit.” That translation misses the mark entirely. When someone says Afiyet olsun at the end of a meal in Turkey, they aren’t wishing you a good meal. The meal is over. They are wishing you health.
Literally, it translates to “let it be health.” It’s a blessing for your digestion, a hope that the food agrees with you, and a subtle acknowledgment of the cook’s effort. You say it when you finish eating. The host says it back. It’s a loop of gratitude.
Most visitors get it backward. They say it before the first bite. The room goes quiet. You realize, too late, that you’ve wished for health on a plate of cold food that hasn’t been touched. Awkward? Mildly. But it signals you’re still figuring out the rhythm.
“Afiyet olsun” is a closing statement. A period, not a comma.
You hear it in homes, street-side kebap joints, and fancy restaurants in Istanbul. The setting doesn’t change the meaning. The intent is always the same: did this nourish you?
If you’re traveling, wait until you put your fork down. Then say it. It’s small. It matters. People notice the details. They respect the attempt to follow the local code.
How to Navigate Table Manners Without Stress
You don’t need a manual. You just need to watch.
Turkish dining is communal. Dishes sit in the middle. You take what you want, when you want it. There’s no passing plates around like a game of hot potato. You reach in. You take. You eat.
But there’s etiquette here, too.
Don’t stand up until the host does. If the older person hasn’t started, you don’t start. It’s not rigid. It’s respect. You see a woman in her sixties pick up her spoon? You pick up yours. Simple.
Use your right hand if you’re eating with hands. Kibbeh, flatbread, some meats. The left hand is for… other things. Keep it clean. Keep it on your lap.
Drink tea from small glasses. Finish it. The host will refill it. If you don’t want more, leave a drop in the glass. It’s the universal sign for “no more, please.” Empty the glass? They’ll pour again. And again. It’s hospitality, not harassment. But you have to signal the stop.
Why Hospitality Feels So Heavy Here
It’s not casual. It’s intense.
You accept an invitation, you accept the load. The host will feed you until you beg for mercy. You’ll eat baklava you didn’t know you needed. You’ll drink raki that burns going down. You’ll smile through the fullness.
Why? Because refusing is rude. Accepting is connection.
Women navigate this differently. You might be expected to help in the kitchen. Not always. But often. If the hostess invites you to “wash the cups,” it’s a test. Do you accept the role? Do you join the labor? If you do, you’re family for the night. If you refuse, you’re a guest. Both are fine. Just know the choice is